STEP 1 | EYES
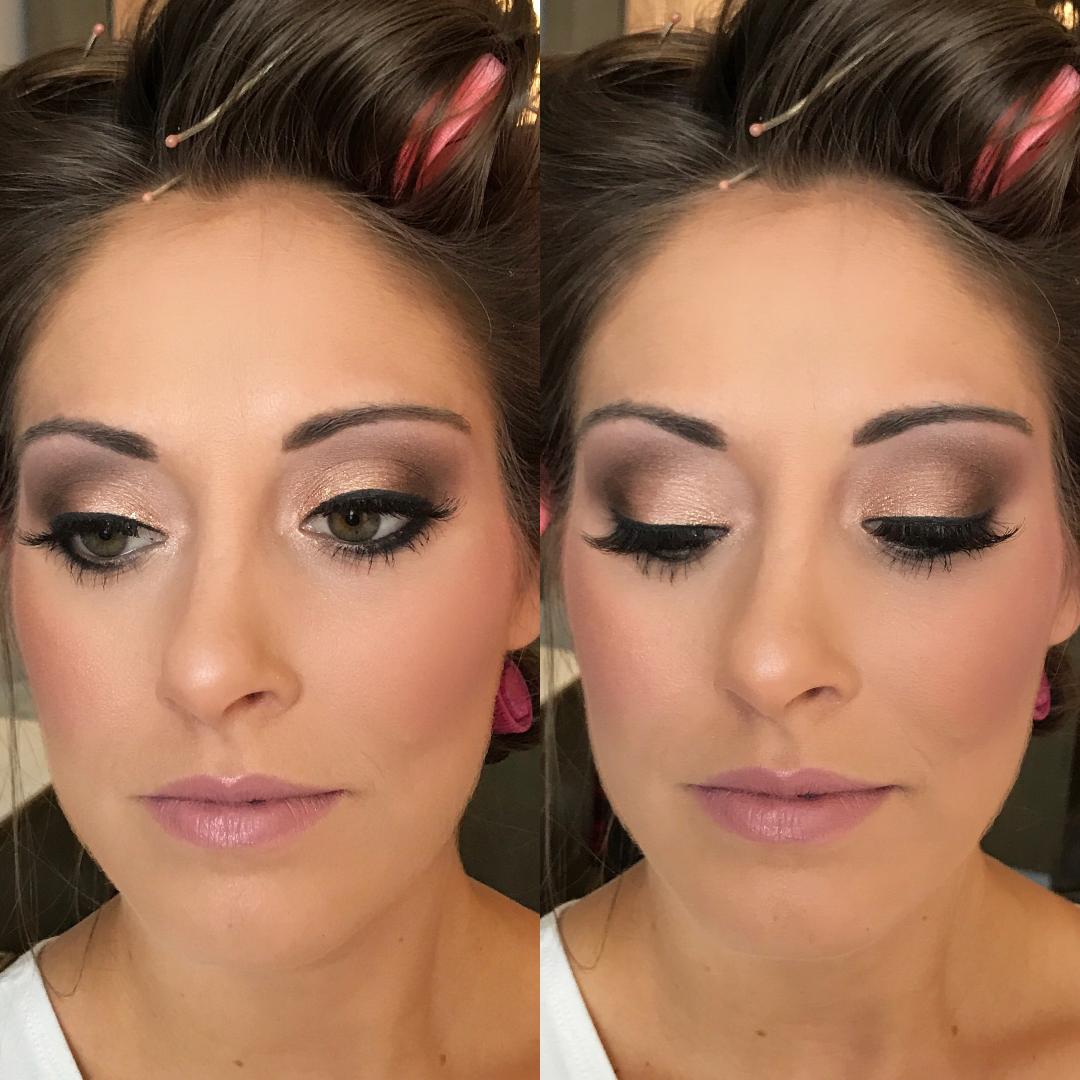
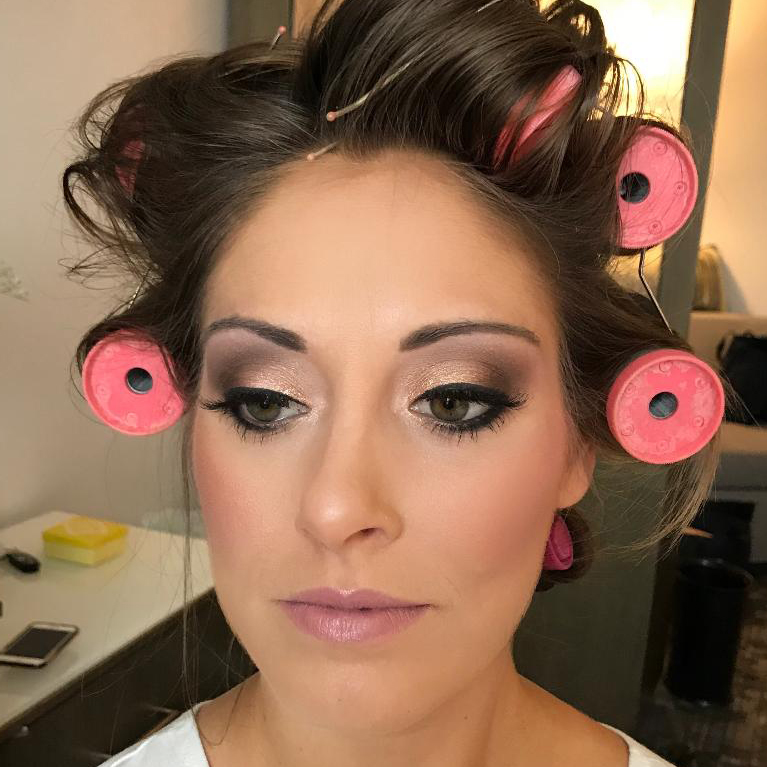
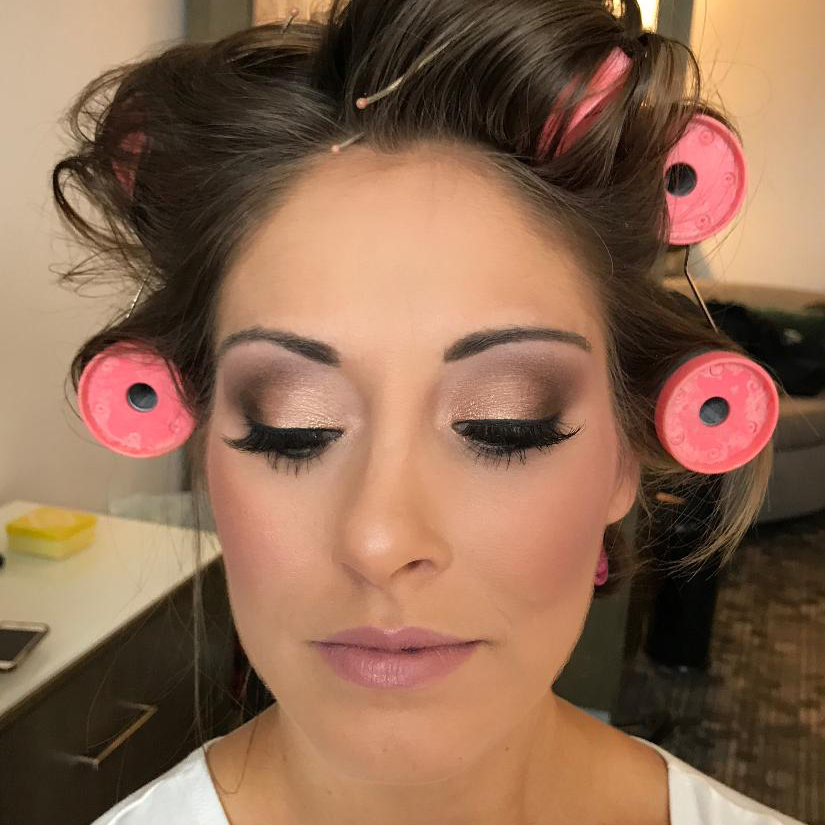
1 | Apply eye primer with this concealer brush across the entire lid. Make sure to cover the entire surface from lash line to the underside of the brow. MAC Paint Pot Primer – color: Painterly with MAC Concealer.
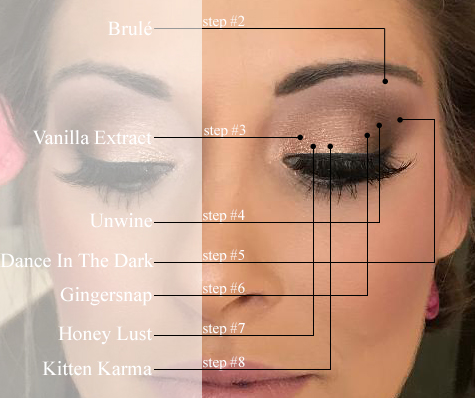
2 | Apply the lightest shadow under the brow line – color, “Brulé” in the Warm Neutral Eyeshadow Palette. Use with the MAC Shaper Brush.
3 | Apply – color, “Vanilla Extract” on the majority of the lid in color from the Warm Neutral Eyeshadow Palette. You’ll want to cover your eye from the lash line to meet the color used in Step #2. Use with the MAC Shaper Brush.
4 | Shade (contour) the natural curvature of the eye with a darker shadow to create definition using color, “Unwine” from the Warm Neutral Eyeshadow Palette. Using the MAC Duo Fiber Tapered Blending Brush.
5 | Repeat Step #4 using color, “Dance In The Dark” from the Warm Neutral Eyeshadow Palette. Using the MAC Duo Fiber Tapered Blending Brush.

6 | Slightly brush the pink shade, color, “Gingersnap” from the Warm Neutral Eyeshadow Palette just slightly over the darker shades in Step #4 and #5. Using MAC Tapered Blending Brush. *tip: I barely dust any powder on.
7 | Go back to the MAC Shaper Brush and tap on color, “Honey Lust” from the Warm Neutral Eyeshadow Palette and simply press (do not brush it on, press it on) over the lighter shade in the inner corner.
8 | Apply my FAVORITE product of 2017! Stila Glitter & Glow Liquid Eyeshadow, color, Kitten Karma. You’re going to use the wand and tap it in the inner corner of the eye once. Then use your finger to slightly tap the product in place. It should ONLY cover the inner half of the eye where the lighter shadow is.
9 | Apply MAC Fluidline Eyeliner in color, “Backtrack” along the upper lash line. You’ll apply with the MAC Small Angle Brush.
10 | Apply false eyelashes, I used Ardell Glamour Wispies. *tip: don’t close your eyes completely when applying the false lash line. Try to look down.
11 | Next up, I smoked out the liner below her lower lash line using color, “Vanilla Extract” from the Warm Neutral Eyeshadow Palette. Use the MAC Pencil Brush and smudge that color form the inner corner to meet the shadow on the upper lash line.
12 | I smoked out the liner below her lower lash line using color, “Unwine” from the Warm Neutral Eyeshadow Palette. The MAC Pencil Brush works the best to smudge the liner along the lower lash line. You’ll want to shade from the outer corner to meet that lighter shade from Step #11.

13 | Add a pencil liner in the waterline of the eye and a little along where we just smoked out in Step #12. I love Make Up For Ever’s Aqua XL Waterproof Eyeliner – this stuff will not move and the only pencil eyeliner in my kit!
14 | Apply Mascara. I love Roller Lash by Benefit.
15 | Shade Brows using, Anastasia Beverly Hills Brow Wiz, color, Medium Brown.
SHOP THE EYE LOOK
STEP #2 | FACE
1 | Apply Too Faced Primed & Peachy Matte Perfecting Primer all over face. I’m loving this primer right now – it’s super mattifying, without looking cakey. It leaves your face feeling moisturized without the oils. It’s a primer that blurs, smooths, and brightens the complexion. I’m seriously in love with this primer. I apply using my fingers.
2 | Apply a thin layer for Marc Jacobs Dew Drops Coconut Gel Highlighter. I love this item and use it on 95% of my clients (and myself). It’s a coconut-infused gel highlighter that can be applied to skin directly or added into foundation or primer for a universally flattering glow. I apply with my fingers – 1 small pump. This product will last you over a year. It’s beautiful to wear alone as well.
3 | Apply Make Up For Ever Mat Velvet Foundation in color, #35. Color, “#30” (what I wear) and color #35 are the two most used colors on all of my clients. I used a Beauty Blender and blended into her neck as well.

4 | Concealer comes next and I used the best war paint on the market 😉 Shape Tape in color, “Light Sand”. I used a Beauty Blender to really blend around the eye and cheek area.
5 | Using the Hoola Benefit Contour Stick, simply carve out the cheek bones, nose and around the hairline. I love contouring with the Beauty Blender.
6 | Apply Laura Mercier Translucent Setting Powder with puffer all over the face with the Laura Mercier Velour Puff.
7 | Next up, I finish the cheek color. I used Charlotte Tilbury in color, ‘Love Is My Drug’ with the MAC Blush Brush.
8 | I finished her cheeks using one of my favorite products by MAC Mineralize Skinfinsh. It’s a beautiful bronzer in color Golden Glow. Using MAC Small Contour Brush.
SHOP THE FACE LOOK
STEP #3 | FINISH
1 | I used a lipstick by MAC in color, “Angel”.
2 | Added a little swipe of Bare Minerals Matte Liquid Lipcolor, in color “Dirty Pastel Pink”.
3 | Last, but not least, I sprayed one of my favorite setting sprays by Urban Decay called “All Nighter”.
SHOP THE FINISHING STEPS
Affiliate links are used in this post & at times results in a small profit. Thank you for supporting my blog. Xo.

Thank you SO SO much for this post! I cannot wait to recreate this look. xx
Thanks so much for the tutorial! I’m totally makeup illiterate and this paint by numbers will totally help! Would love to see a numbered tutorial on the Lorax Unzipped palate too!